Limaが Waiting for the essential requirement 1 of 3: "ssh" で止まってしまった問題の対処
https://github.com/lima-vm/lima の環境をセットアップしたところ、limactl start をしても Waiting for the essential requirement 1 of 3: "ssh" が出続けて一向に完了しない問題が発生。
問題の原因はあれこれ調べたところ、MacOSのユーザー名に制御文字が入り込んでいたことが原因でした。
dscl . -read /Users/$USER RealName | tail -n +2 | od -An -tx1 を実行して制御文字が入っていた場合は、sudo dscl . -create /Users/$USER RealName "山田 太郎" という形でユーザー名を修正し、制御文字が入らないようにすると問題が解決します。
もしくはユーザー名を変更できない場合は lima.yaml で値を変更しても解決できそうです。(未確認)
調査内容
MacOSのユーザー名はLimaが起動するVMのテンプレートに以下のコードで埋め込まれています。
*instConfig.User.Comment はデフォルト値として os/user package の User type の Name フィールドを使っており、MacOSのユーザー名が使われるようです。ここで制御文字が入り込みます。
Comment はテンプレートエンジンを経由して、cloud-initのusersセクションのgecosフィールドとして埋め込まれます。(WSLの場合は別のようなので注意)
- https://github.com/lima-vm/lima/blob/9fc11fa9ec4fedaea3af3a3f1d6987c95dd8360c/pkg/limayaml/defaults.go#L177-L179
- https://github.com/lima-vm/lima/blob/9fc11fa9ec4fedaea3af3a3f1d6987c95dd8360c/pkg/cidata/cidata.TEMPLATE.d/user-data#L33-L35
そしてcloud-init実行時に入り込んでしまった制御文字が原因でユーザーの作成に失敗し、そのまま起動シーケンスが継続されるがSSHをしようとしても出来ない、ということになったと推測しています。
まさかMacOSのユーザ名に制御文字が入り込んでいると思わなかったので調査が難航しました。
Limaへのフィードバック
取り込まれるかは分かりませんが、Comment の制御文字を消す提案をしてみました。この差分を適用することで、ユーザ名に制御文字が入った状態でも正しくLimaの環境がセットアップできることを確認しています。
2026/01/20追記: 上記PRが取り込まれましたので、最新版がリリースされ次第同じ原因では再発しないようになりました。
誰かの役に立てば幸いです!
Googleスプレッドシート+NotebookLMで家計簿を付けると便利
2023年ごろから毎月、スプレッドシートに銀行口座や証券口座などなどの残高を記録するようにしていました。ふと思いつきで、このスプレッドシートと源泉徴収票などのPDFデータをNotebookLMに食わせて遊んでみました。
結論としてはこれが結構便利で、結構いい感じにレポートしてくれます。
例えば「2025年の総括を辛口でして」みたいにお願いすると、「投資に回しすぎて現金減ってるぞ、市場が急変するとローンに首絞められるぞ(意訳)」といった感じで、辛口コメントをしてくれます。
あとは家族構成・ライフイベント・大きな資産状況の変化の理由なども一緒にざっとまとめてソースとして与えてやると、それも踏まえて回答してくれるのでより良い感じの結果を得られます。
Studio -> レポート -> 財務状況報告書 から、財務状況報告書を作っておくと家族に説明するにも便利でおすすめ。音声解説はやたらドラマティックにまとめてくれるので、実用性があるのかは分からないけど一度試すと面白いです。
おためしあれ。
さくらインターネットに再入社した
2015年度の新卒社員としてさくらインターネットに就職、2018年からミクシィ(現 MIXI)で勤務していましたが、2024年7月にさくらインターネットに再入社しました。最近はアルムナイ採用というらしいです。
MIXIでは新規事業(残念ながら未リリースでクローズ)の開発を半年ほど担当した後に、家族アルバムみてねのSREを6年ほど担当し、気づけば6.5年ほど在籍していました。
MIXIはとても居心地が良く職種やポジションに関わらず尊敬できる人が多い会社だったので、大きな不満点はありませんでした。一方で、自分の価値観の変化などもあり「携わる事業を通してどんな価値を生み出したいのか? 自分が本当に力を注ぎたい領域はどこなのか?」を考え、その結果の退職という選択になりました。
さくらインターネットでは2024年下期は主にOSSとして公開されるソフトウェアの開発を担当して、OPAを活用したTerraformの静的チェックツール、さくらのクラウドのTerraform Provider、AppRunという新サービスのGo APIライブラリの開発をしました。
今後は上記のOSS開発とメンテナンスを引き続きやりつつ、ソフトウェア開発メンバーとして次世代ネットワークインフラの開発に携わる予定です。とはいえ、僕はネットワークインフラの開発に関しては経験が浅く不安は大きいですが、面談時に「ネットワークエンジニアとしての修行もやらせてほしい」とお願いしていた結果なので、チャレンジを後押ししてくれる風土に感謝しつつ頑張っていこうと思います。
さくらインターネットというとインフラの会社と思われがちですが、クラウドSDKの開発などソフトウェアエンジニアとして活躍できるポジションも数多くあります。あまり見かけないようなポジションもあり、チャレンジングな課題もあります。興味が湧いた方、ご連絡お待ちしております!
さくらのクラウド - AppRunで画像変換サービスを作ってみた!
さくらインターネットの伊東です。この記事は さくらインターネット Advent Calendar 2024 17日目の記事です。
本エントリーでは、先日リリースされたさくらのクラウドの新サービスである AppRun を一通り使ってみましたので、レポートさせていただきます。
AppRunとは
AppRunは、コンテナ化されたアプリケーションを簡単にデプロイし、自動的にスケーリングを行うサービスです。インフラ管理の複雑さを気にすることなく、開発者が本来の業務であるアプリケーション開発に集中できる環境を提供します。
2024年12月17日時点ではβ版のサービスであり、制約事項があるものの全機能を無料で利用できます。嬉しいですね。
※詳細は https://manual.sakura.ad.jp/cloud/apprun/about.html をご参照ください。
AppRunを使おう
では早速AppRunを使ってみましょう。まずはこれから作るものをざっくりご紹介します。

サンプルアプリケーションとして、オブジェクトストレージに保管された画像を変換するWebアプリケーションを用意します。 このアプリケーションをAppRunでホスティングしてみます。
また、アプリケーションのビルドとデプロイをGitHub Actionsで行い、アプリケーションの更新時に自動でAppRunへデプロイできるようにします。
1. サンプルアプリケーションを作成する
まずはAppRunにデプロイするためのサンプルアプリケーションを用意して、コンテナイメージにまとめます。
nginxで「Test1」といった文字列を表示するだけでは面白みがないため、ちょっとしたアプリケーションを作ってみました。
imagineは、当社の画像変換・配信サービス ImageFlux のごく一部の画像変換機能を自作してみたものです。jpeg, webp, png, gif への画像変換と、width/heightを指定したサイズ変換ができます。
なお、私はImageFluxの実装は見たことがなく、あくまでも雰囲気を真似しただけのサンプルアプリケーションだとご理解ください 🙏
2. 変換元画像を用意する
上記でご紹介したimagineの変換元画像を用意しておきます。今回は 1.jpg, 2.jpg, 3.jpg と3枚の画像を用意しました。
これらの画像を オブジェクトストレージ のバケットに配置します。
3. コンテナレジストリを作成する
サンプルアプリケーションのコンテナイメージをデプロイする先として、コンテナレジストリ を用意します。
このときに、レジストリ自体の公開範囲は「非公開」に設定し、PushとPullの権限を持つユーザーを作っておくのが望ましいです。
4. AppRun Applicationを作成する
前準備はここまでにして、ついにAppRun Applicationを作成します。
4.1. AppRun Applicationの作成手段
Applicationを作成する方法は主に3通りあります。
4.1.1. APIを直接叩く
ひとつめはAppRunが提供する操作用のAPIを直接叩く方法です。
4.1.2. APIライブラリを使う
ふたつめはGoで実装されたAppRunのAPIライブラリを使う方法です。
僕が頑張って作ったので使ってもらえると嬉しいです!!!
4.1.3. Terrafrom SakuraCloud Providerを使う
みっつめは、Terrafromを使う方法です。
内部的に上記で紹介したAPIライブラリを利用してAPIを叩いてコントロールをしていますので、ある意味ではふたつめとの合せ技とも言えます。
こちらも僕が頑張って作ったので使ってもらえると嬉しいです!!!
4.2. TerrafromでAppRun Applicationを作成
本エントリーではTerrafrom SakuraCloud ProviderでAppRun Applicationを作ってみます。
以下のようなtfファイルを作成することでAppRun Applicationを作成できます。
なお、以下の情報を書き換える必要があることに注意してください。(詳細は ドキュメント を参照してください)
container_registryにコンテナレジストリ自体のイメージ名とホスト名、username,passwordに、で設定したPushとPullの権限を持つユーザーの認証情報AWS_ACCESS_KEY_ID,AWS_SECRET_ACCESS_KEY環境変数にオブジェクトストレージのアクセスキーの情報BUCKET_NAMEはオブジェクトストレージに作成したバケット名
また、さくらのクラウドのAPIの認証情報を設定しておく必要があります。詳しくは以下の情報を参照してください。
5. アクセスする
AppRun Applicationが正しく作成されたら、公開用URLが発行されます。
公開用URLはTerraformでdata sourceを利用するか、APIを叩く方法がありますが、せっかくなのでTerraformで取得してみましょう。
以下のようなtfファイルを作成することで、AppRun Applicationの公開用URLが取得できます。
実際に動かしてみると以下のようになります。(idはマスクしてあります)
$ terraform apply
data.sakuracloud_apprun_application.imagine: Reading...
sakuracloud_apprun_application.imagine: Refreshing state... [id=xxxxxxxxxxxx]
data.sakuracloud_apprun_application.imagine: Read complete after 1s [id=xxxxxxxxxxxx]

No changes. Your infrastructure matches the configuration.

Terraform has compared your real infrastructure against your configuration
and found no differences, so no changes are needed.

Apply complete! Resources: 0 added, 0 changed, 0 destroyed.

Outputs:

imagine = "https://app-6d264259-85f4-4ee7-85dc-77a90a0cadf4.ingress.apprun.sakura.ne.jp"
先程の手順でオブジェクトストレージにアップロードした 1.jpg をWebP形式・幅を1024にリサイズして取得してみます。

https://app-6d264259-85f4-4ee7-85dc-77a90a0cadf4.ingress.apprun.sakura.ne.jp/f=webp,w=1024/1.jpg にアクセスすると、AppRun上でホスティングされたアプリケーションにアクセスできるので、ぜひ試してみてください!!
GitHub Actionsでデプロイをしよう
発展して、アプリケーションを更新した際にGitHub Actionsでデプロイをできるようにしてみます。デプロイの流れは以下のようになっています。
- mainブランチにpushされたときに実行
- コンテナイメージのビルド
- ビルドしたコンテナイメージをコンテナレジストリにPush
- コンテナイメージのタグは
latestとcommit idの短縮表記のふたつ
- コンテナイメージのタグは
- AppRunのApplicationに新しいコンテナイメージを反映
作成済みのyamlは先程紹介したサンプルアプリケーションのリポジトリに含まれますので参考にしてください。
なお、GitHub リポジトリの Actions secrets and variables から Repository secrets に以下のシークレットが登録してある前提となっていますのでご注意ください。
APPLICATION_ID: AppRun ApplicationのID。公開用URL同様に、APIやTerraformから取得することができます。SAKURACLOUD_ACCESS_TOKEN: さくらのクラウドのアクセストークン。SAKURACLOUD_ACCESS_TOKEN_SECRET: さくらのクラウドのアクセストークンシークレット。SAKURACR_USER: コンテナレジストリのユーザー名SAKURACR_PASSWORD: コンテナレジストリのパスワード
おわりに
AppRunによるコンテナのホスティングはかなり簡単に行えたので、アプリケーションの実装に注力できてとてもいい感じでした。特に今回サンプルアプリケーションとしてご紹介したようなステートレスなアプリケーションと相性がいいですね。
また、本エントリーでは紹介できませんでしたが、AppRunにはアプリケーションのバージョンを管理する機能があり、バージョン間でトラフィックを分散する機能があります。 この仕組みを使えばカナリアリリースを行うことも可能で、AppRunが正式版としてリリースされれば、実運用にも耐えられると感じました。
AppRun自体の機能や周辺ツールなど「こんな機能があったら便利だな」というアイディアがありましたら、窓口 からフィードバックをお寄せください。
以上、最後まで読んでいただいてありがとうございました!
さくらのクラウドのオブジェクトストレージをaws-sdk-go-v2で使ってみる
どうもこんにちは。今年の7月にさくらインターネットに出戻りしました。 ということでさくらのクラウドで色々と遊ぶために、まずはさくらのクラウドの オブジェクトストレージ を aws-sdk-go-v2 から使ってみましたので、そのやり方をメモしておきます。
ここまででお分かりのとおり、さくらのクラウドのオブジェクトストレージはAWS S3互換です。このため、AWS SDKからバケットやオブジェクトの操作をすることができます。
ちなみに世の中にはこれ以外にもいくつかS3互換オブジェクトストレージが存在しますので、その他のAWS S3互換オブジェクトストレージでも概ね同じような形で扱うことができます。
先にサンプルコードを貼っておきます。 gist.github.com
ポイント
1. BaseEndpointの変更
オブジェクトストレージの サービス仕様 にも記載があるとおり、エンドポイントを変更する必要があります。
aws-sdk-go-v2 s3 packageの NewFromConfig でBaseEndpointを変更することができます。
2. リージョンの変更
環境変数 AWS_REGION を指定することでregionを jp-north-1 に変更します。
また、コード上で変更したい場合はBaseEndpoint同様にs3 packageのNewFromConfigから変更が可能です。
client := s3.NewFromConfig(cfg, func(options *s3.Options) {
    options.BaseEndpoint = &baseEndpoint
    options.Region = "jp-north-1"
})
3. アクセスキーIDとシークレットアクセスキーの設定
オブジェクトストレージ サービス基本情報 | さくらのクラウド マニュアル に従って、オブジェクトストレージにアクセスするための アクセスキーID と シークレットアクセスキー が作成できます。
環境変数 AWS_ACCESS_KEY_ID にアクセスキーID、AWS_SECRET_ACCESS_KEY にシークレットアクセスキーを設定することでAWS SDKがそれぞれの値を使ってくれます。
また、コード上で設定したい場合はcredentials packageの credentials.StaticCredentialsProvider にアクセスキーIDとシークレットアクセスキーをセットすればOKです。
creds := credentials.NewStaticCredentialsProvider(accessKey, secretAccessKey, "")
cfg, err := config.LoadDefaultConfig(ctx, config.WithCredentialsProvider(creds))
TIPS
ちなみに、aws-sdk-go-v2自体のEndpointResolver 等を利用するエントリーもありますが、これはdeprecatedとなっていますのでご注意ください。詳細についてはパッケージのコメントを参照してください。
2023年 振り返り
今更という感じですが、2023年の活動についてまとめておきます。(1年に1エントリーペースでしか書いてない…)
仕事
一応断っておきますが、以下全て個人の感想です。所属組織の意見を代表するものではありません。
全体を通して
引き続き株式会社MIXIに勤務していまして、家族アルバム みてね のSREをやっています。勤続7年目に突入しました。時が過ぎるのはあっという間。
勤続年数が長くなってきたこともあり、サービスのコアとなるような要素技術にもある程度明るくなってきたのでその知識を使って社内勉強会を開いたり、登壇や執筆を積極的に行った1年でした。このあたりはある程度手応えがあって良かったポイントです。
逆に、部屋の中の象といわれるような問題に対しての改善の提案だったり、わりと大きめのアーキテクチャの変更などは上手くコントロールできず成果を出せなかった反省も多い1年でした。いい意味で大きなストレスなく日々の業務に当たれている一方で新卒の頃のような右も左も分からないけどがむしゃらに仕事に打ち込む熱量を失ってしまったなーと思うこともあり、2024年はもっとチャレンジしていきたいです。
登壇 & 執筆
昨年は4回登壇の機会をいただきました。前職ではわりと登壇の機会が多かった一方で、転職後でこんなに登壇したのは初めてでした。加えて2本記事の執筆もしました。
会社やサービスのブランディング、キャリアアップのためのセルフブランディング、技術コミュニティへの貢献など目的は様々だと思いますが、外部露出は目的を持って狙って動かないと割く時間の割には得られるものが少なくなってしまうと感じる事が多く、改めて目的を意識することの大切さが身に沁みました。
また、反響の有無は、内容の質・分かりやすさ、ワードチョイス、ネタの鮮度(リリースしたばかりの注目度の高いなにかを使ってみたとか)など色々と要因がありそうで、個人的には「めちゃくちゃおもしろい!」と思った内容で全く反響がなかったり、逆に意外と反響が大きかったり、自分の思い通りには全くいかず難しいなと感じることが多かったです。
- 「無料・容量無制限でアップロード」を 支える みてねのコスト削減術 - Speaker Deck
- 「家族アルバム みてね」を支える SREのこれまでとこれから - Speaker Deck
- データベースにまつわるトイル削減の新手法の提案 - Speaker Deck
- Aurora MySQL version 3でTempTable溢れの振り返り - Speaker Deck
- External Secretsから参照しているパラメータの削除忘れを防ぐ - mitene / FamilyAlbum Team
- DBのコストを半額に!〜Amazon Aurora I/O-Optimizedの活用〜 | by hekki | mitene / FamilyAlbum Team
プライベート
家
現在居住中のマンションを売って、郊外に家を建てることにしました。 2023年の春頃から本格的に動き出して、それ以降プライベートの大半は家のことを考えてました。まだまだ全行程完了していないですが、落ち着いたらまとめるぞ。
猫
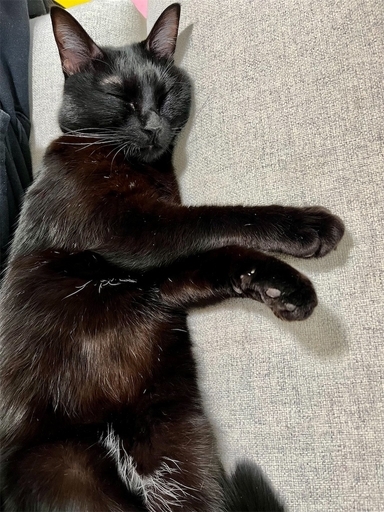
2023年1月に保護猫を迎え入れました🐈⬛(その後に家の話が出てきてしまい、引っ越しは猫にとってストレスなので申し訳い気持ち。) 元野良猫なので正確な年齢は不明ですが、4歳の黒猫です。ばり可愛い。
英語
学生時代から英語が苦手でのらりくらりとやってきたものの、英語の壁を感じてチャレンジできない機会が何回かありました。
さすがに悔しかったので、今年は英語をやっていく所存です。「グローバル人材に俺はなる!!」みたいな謎の目標だといつまで経っても達成出来ずにダレるので、まずは分かりやすいTOEICのスコアアップを目指します。
「TOEICでハイスコア取っても英語は喋れるようになれない」的なことを言われがちですが、とにかくハイスコアを目指します。ハイスコアを取れるようになって、それでも全然だめだったらそのときに方針転換するつもり。
おわりに
今年はぼんやりと考えてることを言語化する練習のためにもブログを書くぞ!!!!
Macのターミナル環境再構築メモ
Macの調子が悪く、クリーンインストールをしました。
せっかくなので、ターミナル環境の構築メモを残しておきます。
基本的に、デフォルトの設定からなるべく変更しないことを良しとしているので、あまり面白くないかも。
iTerm2
他のターミナルソフトもしらべてみたものの、なんだかんだでiTerm2に落ち着きました。
設定はそれほどいじっていませんが、主な変更点はこちら。
- Color PresetsをJapanesqueに変更。
- FontはMonaco・フォントサイズ15。
- Non-ASCII FontはUbuntu Mono derivative Powerline ・フォントサイズ15。
Homebrew
みんな大好きHomebrew。
fish shell
shellはbash -> zsh -> fish shell という感じで渡り歩いて、fish shellで今の所は落ち着いています。
プラグインマネージャーはfisherを使います。
また、プラグインは下記のプラグインを使っています。
jethrokuan/zlaughedelic/brew-completionsmatchai/spacefish
tmux
tmux自体はbrewでインストールしています。
プラグインマネージャーはtpmを使います。
詳細はtmux.confにて。
以上!